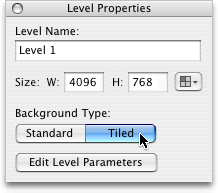
Tiled level backgrounds are comprised of a grid of images, each measuring either 32 by 32 pixels or 64 by 64 pixels. Unlike standard backgrounds, tiled backgrounds do not support parallax scrolling. To create a tiled background, first make sure the Background Type is set to Tiled in the Properties floating window, as shown below:
Next, enter Tiles Mode by clicking Tiles at the top of the Levels Window. The Pencil Tool, Hand Tool, and tile size controls will become available, and the Tile Palette and Tile Solid Material Mask editor will appear at the left side of the Levels Window.
Drawing Tile Backgrounds
To assemble a tiled background, select a tile from the Tile Palette on the left side of the Levels Window, and using the pencil tool, click on the level to apply the selected tile. The pencil can be dragged across the level to apply multiple copies of the selected tile. The Undo command in the Edit menu can be used at any time to undo mistakes (command-Z).
Editing Tile Solid Material Masks
Each tile in the Tile Palette has a built-in Solid Material Mask, which determines which parts of the tile are comprised of solid material, which parts represent empty space, and which parts contain ledge material. When a tile is placed in a level, the level's own Solid Material Mask is altered accordingly.
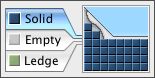
The selected tile's Solid Material Mask can be edited using the controls found at the left side of the Levels Window, below the Tile Palette. First, select a material type by clicking either the Solid, Empty, or Ledge materials from the tile mask editing interface. Then drag the mouse over the nearby tile display to draw blocks of material onto the selected tile. Solid Material should be drawn over areas depicting walls, the ground, or other impenetrable surfaces. Empty Space should be applied to areas through which the player and other objects will be allowed to move freely. Ledge material represents areas through which the player may move upward, but not downward. More information on the uses of these three materials is available in the Solid Material Mask Editing section. Once a tile's Solid Material Mask has been changed, future applications of that tile will affect the level's own solidity.
Adding New Tiles
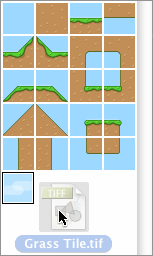
The contents of the Tile Palette can be modified with your choice of up to 255 tile images. To add a new tile to the palette, create an image of the desired tile size in an image editing application and drag its icon into the Tile Palette, as shown below:
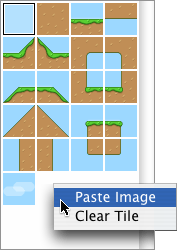
Alternatively, the image may be copied to the clipboard from within an image editing application and pasted into the Tile Palette using its contextual menu. Control-click on the empty space at the bottom of the Tile Palette and select Paste Image from the contextual menu as shown below. (You may need to scroll to locate the empty space at the bottom of the Tile Palette.) When the new tile is added, it will become the last tile in the Tile Palette.
Deleting Tiles
To delete a tile from the Tile Palette, control-click the tile that you wish to delete and select Clear Tile from the contextual menu. Alternatively, the tile may be selected and the Cut or Clear command may be chosen from the Edit Menu.
Replacing Tiles
To replace an existing tile, first copy a new tile image to the clipboard. Then control-click on the tile that you wish to replace in the Tile Palette, and select Paste Image from the contextual menu that appears.
An alternative way to replace a tile is to select the tile that is to be replaced in the Tile palette and choose Paste from the Edit menu (command-V).
Replacing Multiple Tiles
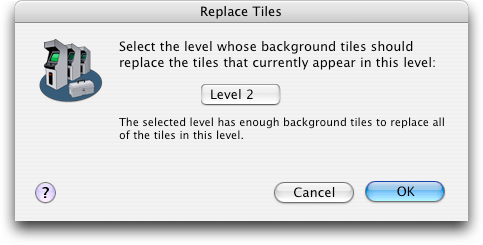
It is possible to replace a level's entire Tile Palette with a set of tiles from another level. To replace a level's tiles, select Replace Tiles... from the Edit menu. The Replace Tiles dialog box will appear, as shown below.
Tile Background Design Techniques
Designing excellent tiled backgrounds involves creating the illusion that the background is not tiled. This effect can be easier to achieve if tiles are made to repeat smoothly. It may be beneficial to depict the seams where different materials intersect (such as where the ground meets the sky) in the center of tiles instead of at their edges. This makes it easier to prevent the divisions between materials from appearing as sharp horizontal or vertical lines.
If creating a realistic environment using tiles proves difficult, standard backgrounds should be considered as an alternative for all but the largest levels. Besides providing an unrestricted drawing space, standard backgrounds offer parallax scrolling, which is not possible with tiled backgrounds.
Keep in mind however that by their nature, tiles lend a unique style to game graphics. Players may appreciate the evidence of the careful, thrifty use of graphical resources inherent in well designed tile backgrounds.