Designing a Level
Level design consists primarily of creating terrain and adding objects. In this tutorial you will establish a landscape first, then populate it with objects, including scenery, items, and characters.
Since the level in any newly created game project uses tiled backgrounds by default (as opposed to non-tiled "standard" backgrounds), you will begin sculpting the landscape by placing background tiles into an interesting arrangement.
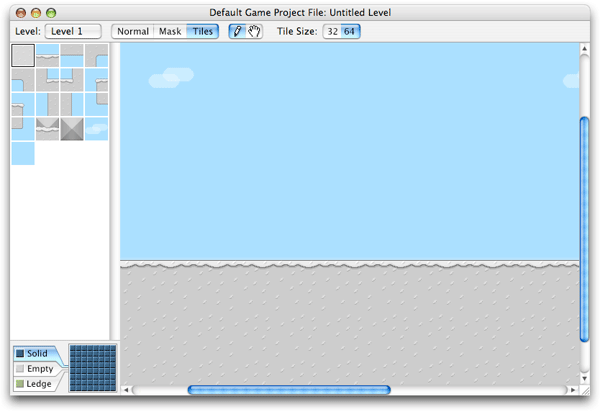
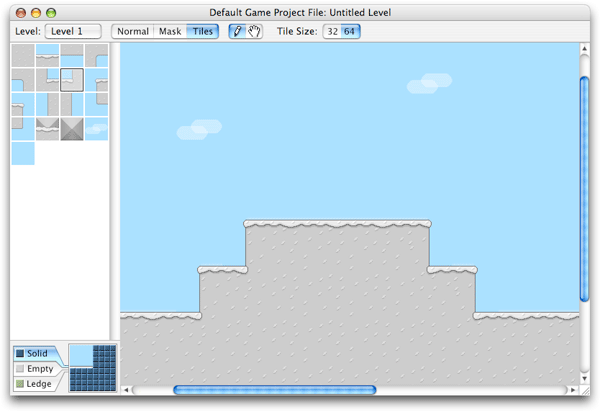
Switch to Tiles Mode by selecting Tiles Mode from the Level menu (Command-I.) You will be creating a bumpy landscape for the eskimo to walk over. Select a tile from the tile palette and click on the level to place each tile. You will need to make use of several horizontal and cornered tile pieces. The finished terrain should look something like the image shown below:
Don't worry if it takes a while to figure out which tile pieces to use; it will become easier to assemble backgrounds with practice.
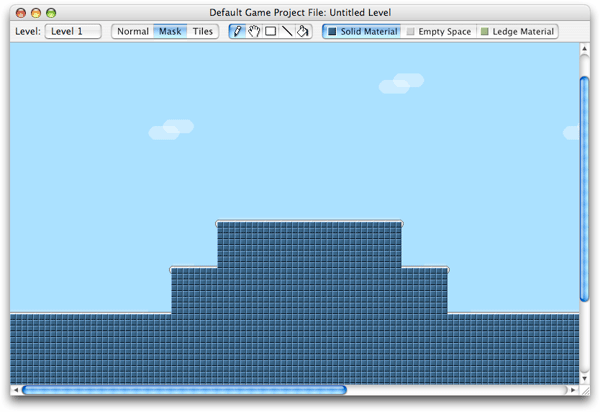
Now that you have created a background, we are going to take a look at the level's Solid Material Mask, which indicates which portions of the level consist of the solid ground on which characters may stand, and which areas consist of empty space. Switch to Mask Mode by selecting Mask Mode from the Level menu (Command-U.) The blue blocks that appear will reveal that the level's Solid Material Mask was automatically updated to match the changes made to the terrain. Later we will override this automatic updating, but for now, it should be left as it is.
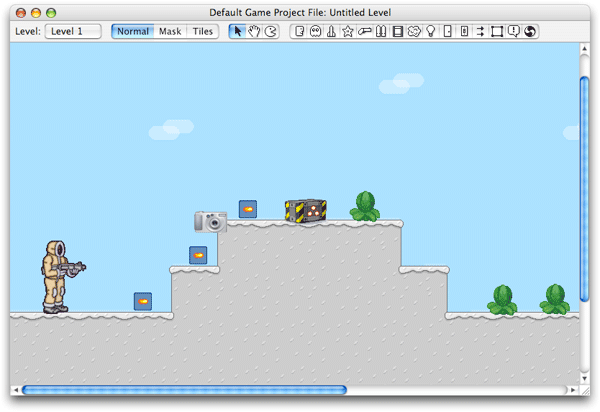
Now that the background tiles have been laid out, you will add some animated scenery to the level. Switch back to Normal Mode by selecting Normal Mode from the Level Menu (Command-Y.) Select the Animated Scenery tool from the tool palette. (Its icon looks like a piece of film.) Click anywhere on the level to add the animated scenery to the level. The default scenery is a green plant called Arctic Cabbage. After the Arctic Cabbage has been placed in the level, the Arrow Tool is automatically selected, allowing you to drag the new scenery into position. Switch back to the Animated Scenery tool and add more Arctic Cabbage. Drag each piece of scenery into position until the level looks like the one shown below.
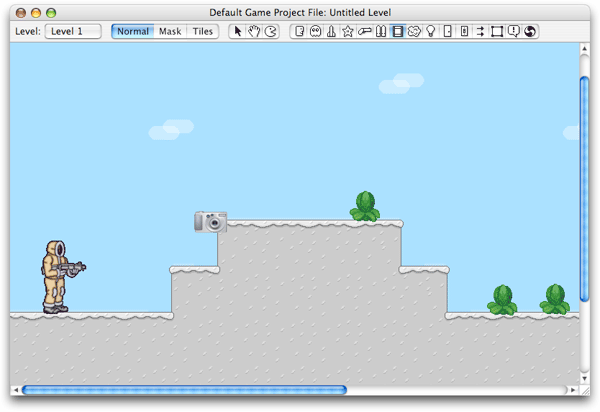
Next you will add some ammo packs and a weapon to the level so that the player has some items to collect and use. Select the Ammo Pack tool from the tool palette (its icon looks like a rocket.) As with the animated scenery, click on the level to place the ammo packs, and use the arrow tool to drag the new items into place.

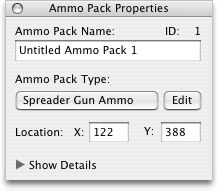
These new ammo packs are going to supply a particular weapon–the Spreader Gun–with ammunition. Select each ammo pack and, using the controls in the floating Properties Window, change the Ammo Type to Spreader Gun Ammo, as shown below. (If the Properties Window is not visible, make sure that the Properties item is checked in the Window Menu.)
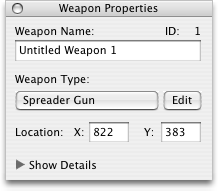
The last object that you will be adding to the level is the Spreader Gun itself. In your game, the player will be able to pick up the Spreader Gun and the Spreader Gun Ammo Packs, allowing him to fire the gun. Select the Weapon tool from the tool palette, and place a weapon in the level as shown below. Use the Arrow tool to drag the weapon into position.
Again, use the Properties Window to set the item's type. Select Spreader Gun from the Weapon Type pop-up menu.
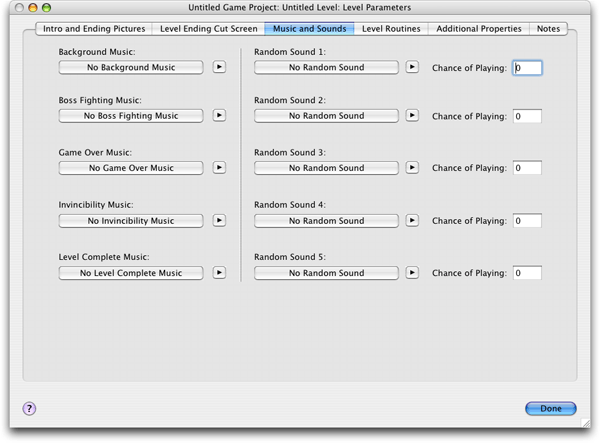
Now you will be introduced to the Level Parameters Window. This window contains controls for specifying a variety of settings that affect the appearance, behavior, and soundtrack of a level, as shown below. Open the Level Parameters Window by selecting Edit Level Parameters from the Level menu (Command-L.)
Though this window serves many purposes, let's just explore the Music and Sounds tab for now. Select the Music and Sounds tab, and locate the Background Music pop-up menu near the top left corner of the window. Select Octopus Dance from the pop-up menu. Click the button with the triangular Play icon to preview the selected track. (The selection of music tracks can be increased if you wish; this is covered in the Adding Music Tracks section of the User's Manual.) When you have set the level's background Music to Octopus Dance, click the Done button at the lower right corner of the window.
Now the level has been fully sculpted, populated with items, and given background music. In the next section of the tutorial, you will add some characters to the level.
Next: Adding Characters